Wednesday, June 30, 2010

Hand Quilting... Can I Do It ? ? ?


I'm starting with a miniature quilt.  14.5" x 14.5"  Smart!
I thought I could start and finish this in a short evening.  Not so smart!

I sewed two lines, both of which need to come out.  :(
I learned where NOT to quilt.  :)
Stitching just outside the diagonal lines runs into too many layers of fabric    I'm going to try a straight up and down, and side to side grid in the middle of the blocks... no where near the intersection of lots of seams.

I discovered I DO need a thimble... sore middle finger.  Ouch!
That means a trip to the quilt shop... yippee!
I also discovered, much to my surprise, it's relaxing to hand quilt.

Can't wait to finish quilting so I can put the binding on... rose colored matching the inner border.  Stay tuned.

Tuesday, June 29, 2010

Kid Stuff - June Visits With Sarah And The Boys

Sarah, Cooper and Dexter visited a couple times in June and stayed for a few days when they came.
The front porch was a popular hangout.

And water play was a popular activity.

Cooper enjoyed his ride in the wagon but I think he liked it better when Dexter rode with him.
....happy brothers

Kid Stuff - June Birthday Celebration

Zak's birthday is in June. Caycee and Lynzee were born in July. Justin will be out of town for two weeks of USMC training and will miss Caycee's and Lynzee's birthdays. So Justin and Dayna had one big celebration for all of them.


Oh look! It's someone just my size!
Checking each other out.  Do you see Zak just entering the scene on the right?  This was so cute... several adults said "look out for the babies Zak!"  Instead of veering around them to go where he had been headed he grinned and plopped right down between them and had a little visit.
Looks like Lynzee adores him.  She really does.  Dexter was pretty fascinated too.
Caycee - the rough and tough tomboy - is turning into quite the little princess. 
She asked me recently if I used to be a princess :)


I love the way Cooper treasures his treats before devouring them.
He was so good watching the birthday kids opening their presents... gotta be so hard at that age!

Monday, June 28, 2010

Kid Stuff - June Picnic

Early this month Scott and I picked up Zak and Caycee and we all went on a picnic at Gebhard Woods.  We're not quite ready to handle all three kids at once on an outing so Lynzee had some alone time with her mom.  Grandma left the directions and the Garmin at home so we wandered around aimlessly for a while until a phone call to Sarah saved us. 

Caycee and I walked to the bridge to look across the icky pond to a waterfall.
Meanwhile, Grandpa and Zak went to check out the baby geese with their parents.
Back to the bridge...


Caycee says "my turn, Grandpa"

We ended with chocolate pudding.... you can see it was a hit!

Project Quilting - Log Cabin


The Rules:

1. The inspiration is the Log Cabin block.
2. Use as many fabrics as you like, but use both the front and reverse sides of at least one of them.
3. Maximum size is 36" x 36".


I made three green and purple blocks with the purple pieces wider than the green.  I forgot to take a picture of the blocks before they were cut into this petal shape.

I put Texture Magic on the back and quilted the blocks. 


Steaming the blocks on the Texture Magic side gave it the scrunched up, crinkly look.
The three petals were sewn along the sides to create a three dimensional flower.
Do you see the spot of dew? (two sequins)
Several pipe cleaners spiral wrapped in green fabric make the stem which was then poked through an opening in the bottom of the flower cup and stitched in place. 
Long, long ago my nieces (yes, Karen was one of them) showed me how to make a vase by covering a glass bottle with  little bits of masking tape and then rubbing it with shoe polish.  That was the inspiration for my fabric base.  I use two brown fabrics and both sides of one of them. There are a few hundred little bits of brown fabric attached to a base piece of fabric.  Two layers of stabilizer was added to the other side of the base fabric.  I sewed a few darts in the top to make top narrower.  Then sewed the piece into a cylinder.  On the bottom I long stitched several pieces of floss and gathered to make a base.


This was another fun (hair-pulling), educational (what NOT to do), exciting (will I finish in time?!) project. 

Won't you join us next time?

See the other entries at Flickr
Vote (until 7 pm July 3rd) at Kim's Crafty Apple.
Leave a comment on Kim's blog and you might win a prize!

Sunday, June 20, 2010

Happy 35th To Us

More than 35 years ago ....
This pic was taken the day we became engaged. It was a work (DEC-rative) picnic.


A year later...
(oh my goodness, we were so young!)

Followed by so much fun, work, a few sad goodbyes, joys, laughter, tears and blessings.


These beautiful flowers arrived with this note:
"Thanks for the adventure. It's been a great 35. Let's do it again."

Okay... I'm ready. Let's!

Saturday, June 19, 2010

Top Ten Reasons To Try "project QUILTING"

10.  You'll challenge yourself

  9.  There's a prize for public vote winner

  8.  Judges will critique your project and you'll get compliments

  7.  Each entry goes in a random drawing for a prize

  6.  You'll get a finished project in just one week

  5.  You'll push yourself out of your comfort zone and learn new things

  4.  There's a prize for Judges' winner

  3.  Judges will critique your project and you'll get advice for making improvements

  2.  There's an awesome prize package at the end of the season for the overall winner


And the number one reason to try "project QUILTING"....

It's FUN!

Are you convinced yet?  Join us this week!  Challenge rules will be announced Sunday at noon at Kim's Crafty Apple.

Thursday, June 17, 2010

project QUILTING - RECYCLE! challenge

The rules we had to follow: 
1. The front, back, borders, binding and embellishments should all be made from materials that have had a previous life as something else.
2. You may use new thread and batting.
3. Your project should include at least 3 different materials used as embellishments.

I rummaged through closets and came up with an old police academy uniform shirt of Justin's, two shirts from my horse show days, and a blouse that would look great on me if I just lost 10 pounds.... I'm not waiting any longer for that to happen - if it does I'll buy a new blouse.


I decided on a hand sewing kit.  I've been sewing in the living room and my stuff gets spread all over the end table.... quite a disorganized mess.   I started by using the uniform shirt and the blouse to make simple blocks for the outside of the sewing kit.


For the inside I used the green cowboy shirt and the uniform shirt as the base.  I sewed little pockets in the stripes on the bottom right and on the bottom left I sewed covers for needles, both large and small.  I used the button placard from the white ratcatcher to make pockets for bobbins of thread by folding, pleating and sewing the bottom of the strip to the base.  A few stitches on either side of each pocket keeps it from falling.  A larger strip of fabric from the same shirt became larger pockets for floss.  To dress it all up I embroidered the name of each item to be stored in the kit.   Four buttons from another shirt were added to the inside as one embellishment material.

It's hard to see, but there are two pockets inside for patterns, projects or pieces of fabric.


To complete the embellishment requirement I added ribbon and beads from a gift bag to a couple blocks on the outside.


Finished size: 12" x 12"   
Here it is loaded and ready to sew....

This was another fun challenge.  Unlike the first two challenges, I only started one project and then finished it. It changed and developed as I went. 

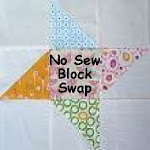
If you are looking for a challenge, join us for the next one.  It starts Sunday at noon.... go to Kim's Crafty Apple for all the details.  You can also see the other entries and vote for the Recycle! challenge at Kim's Crafty Apple until 7:00 Friday evening.  And, even if you didn't participate in the challenge, you can still qualify for a prize. 

Wednesday, June 16, 2010

A Tea Party Comes Together

The teapots are all together in the center of the quilt.  All these little pieces are part of the border of teacups.

The cups and ribbon border comes together...


In the process of making all the twisted ribbon for the border there was a great deal of trimming.  I sewed a second line of stitching so that when I trimmed I had small a HST to keep. 


These made 1.75" HST.  Bonus!  Lots (over 100) of HST in four different varieties....


I drew the line at these itty bitty pieces.  I might just keep the triangles but making HST that measured 3/4" seemed a bit much.  Cute, yes.  But, still, a bit much.  Agreed?


Back to the tea party.  It's ready.  Well, it needs to be quilted, but it's pieced!  Woohoo!

Monday, June 14, 2010

Friday, June 11, 2010

My Sister, My Friend


Happy Birthday Colleen!


May the dear Lord bless you.

(I miss singing that part)